
How to Build a Firepit
Here's an Easy-to-Build Fire Pit You Can Make in One Day
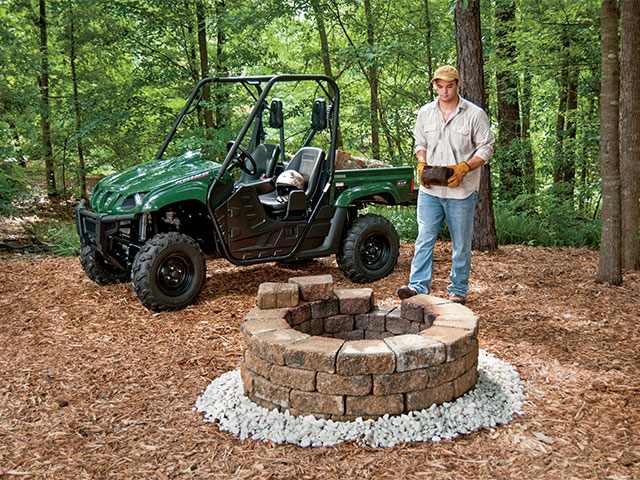
There are few times more relaxing than sitting by a warm fire outside on a cool late-fall evening. Here's a quick and easy way to enjoy that fire tonight.
This firepit project is the most watched project video DTN/Progressive Farmer has ever released. Watch the video for construction details and answers to some of the questions we've received about this project: https://www.youtube.com/…
We built this fire pit in six hours. It cost a bit more than $500. That includes the gravel and sand for the base, landscaping stones and, in this instance, the steel ring and grate for cooking.
Here are directions and tips to go along with the video:
-- Tools. You won't need many tools for this project. In addition to a shovel, pickaxe, rake and wheelbarrow, you'll need a hammer to tamp the stones into place and a brush to clean each layer before adding new stones. If you have a soil tamper, or something similar it's a good to have one on hand to compress the sand and rock base.
P[L1] D[0x0] M[300x250] OOP[F] ADUNIT[] T[]
-- Foundation. Dig a hole 2 feet wider than the overall diameter of the fire pit. Dig out 12 inches of soil and tamp down the bottom of the hole. Fill the hole first, with 4 inches of gravel followed by 4 inches of sand. Tamp down the base. Onto the base, lay down the first course of blocks. Make sure this course is level in all directions. The base requires a good deal of digging. But that labor paid off, as the fire pit has not shifted or sunk over the course of many years. One more suggestion: In the center of the pit, you might dig a fencepost-sized hole 2 feet deep and fill it with gravel to allow any rainwater in the firepit to more easily drain.
-- Build. Lay additional courses of stone. In this project there are 14 landscaping stones for each course. To keep the courses aligned, hang a weighted length of string over the edge of the top-most course. When the outer edge of each course touches the string, all courses are roughly perpendicular. We used landscaping blocks. These concrete blocks may crack over time from heat, but they are inexpensive to replace. Never use stone that has been submerged in water.
-- Stagger. Overlap each layer of stone leaving several random gaps between stones. The gaps allow the fire to draw air into itself. The stone is dry stacked. If you want to cement the courses, apply cement only to the outside half of the stones to protect the cement from the heat. Adhesives are not a good choice for this application.
-- Gravel. Spread a layer of gravel both over the inside area of the fire pit and in a layer several inches wide around the outside edge of the fire pit.
-- Finish. Our firepit includes a steel ring and grate. The lip of the ring sits on top of the next-to-final course of stone. Then a final layer of stone is laid over the edge of the ring. As built here, the fire pit is seven courses and about 25 inches tall. You may find however, that fewer courses helps the fire burn more vigorously and radiate more heat.
Note about the ring: Two thoughts about the steel ring and grate. First, the ring and grate were purchased as specialty items from a supplier no longer in business. If you can't find these two pieces elsewhere, you can make them on your own or have them made by a welder. The inside diameter of the fire pit is 32 inches. The ring should include a lip to overlap the top edge of the stone. But second, the fire pit works just fine without the grate or steel ring. In fact, without the ring, the firepit may better draws air into the fire through the random gaps in the stone.
-- Supplies. Depending on the height of your firepit, use up to 98 retaining wall blocks (12 inches by 4 inches by 8 inches), 1 ton of sand, 1 ton of gravel.
Difficulty (1-5): 2
Time: 1 day
Cost: $500
Dan Miller can be reached at dan.miller@dtn.com
Follow him on Twitter @DMillerPF
(c) Copyright 2021 DTN, LLC. All rights reserved.