
In Season Sampling Tips
Grab A Tissue
Tissue analysis is an effective way to determine if and how much additional nutrients crops need in season to maximize yield potential.
However, tissue samples need to be collected and handled properly to get accurate test results, crop specialists agree.
Bobby Golden, eastern U.S. technical services manager for J.R. Simplot Companies, and Nutrien senior agronomist Mike Howell provided sampling tips during a webinar to help farmers navigate the sampling process. Golden was a Mississippi State University (MSU) Extension rice and soil fertility agronomist at the time of the webinar.
Golden contends multiple nutrient deficits in crops, such as sulfur, potassium and nitrogen in corn, would be difficult to diagnose without a tissue test.
"It can get really muddy to know what you need to apply to correct (multiple) deficiencies because the classical symptomology isn't there," Golden says. "(Tissue sampling) is a good way to spend a small amount of money to save from spending a bigger amount of money applying the wrong nutrient."
CHEAP INSURANCE
In-season fertilization can help farmers boost yields and cash in on high commodity prices. Howell asserts tissue sampling and tests are akin to a cheap insurance policy -- helping farmers only apply what's needed to maximize production.
Tissue tests generally cost between $10 to $20, depending on the laboratory, Howell and Golden agree. MSU charges $8 per test, which is a little cheaper than the industry standard because it's a public institution.
"Tissue sampling is a good way to see what's going on with the crop to determine what's needed to get yields up to the level farmers want with high commodity prices," Howell explains.
Fertilizer costs also skyrocketed for the 2021 growing season.
Golden says putting on the wrong nutrients or amount can negate profit potential.
"Sampling helps farmers spend wisely to determine the hidden hunger-robbing bushels," he adds.
BEST PRACTICES
Howell says tissue sampling is one of the best ways for farmers to verify if crops need more nitrogen, phosphorus, zinc or other nutrients at various growth stages, but specific protocols need to be followed.
"If (farmers) are taking tissue samples incorrectly and not handling them right, they're going to get bad data," Howell says. "We won't know exactly what to do. Like anything else, we only get what we put into it (good samples and data)."
Farmers need to be cognizant of crop growth stages when collecting tissue samples and make sure leaves or whole plants that are submitted for analysis are free of soil, pollen or other residue that could lead to erroneous results. "It's the key to getting a good result and saving money and maximizing return on investment," Golden says.
A minimum of 1 gram of dry plant tissue is needed to test. In general, it will take 20 to 25 leaves or plants -- depending on the crop and growth stage -- to equal one tissue sample for analysis. Farmers can submit one or multiple tissue samples per field.
The following are tissue-sampling tips for various crops and growth stages:
CORN
-- Small plant up to V6: The whole plant is needed. Cut the plant at the soil surface. Remove dead leaves and roots. Gently scrape or wash off dirt with water if needed.
P[L1] D[0x0] M[300x250] OOP[F] ADUNIT[] T[]
-- V9 or V10: Take the oldest, most mature leaf of the young growth. Start at the whorl and work backward to the most fully expanded leaf that's mature and has formed a leaf collar. Pull that leaf. Each part of the leaf has a different nutrient value, so make sure the whole leaf is removed.
-- R1 (silking): Remove the leaf that's opposite and one down from the ear leaf or the ear leaf itself. Again, make sure the whole leaf is taken.
-- Ear formation or brown silk: The procedure is the same as R1, but this is the stage farmers need to be sure pollen residue doesn't contaminate samples.
For nutrient analysis, Golden says green tissue isn't a must, but samples need to be as dry as possible. "It's OK to leave samples on the dash of the truck for a day, as long as it's clean."
SOYBEANS
-- V5 or younger: Send in the whole plant. Cut the plant at the soil surface. Soybeans are trickier than corn, Golden says, since soil and dust tend to collect more on the underside of leaves. Carefully clean plants with water and dry before shipping them to a diagnostic lab.
-- V6 to R1: Count down from the top to get the uppermost fully matured trifoliate. You don't want to send just the trifoliate leaf. Clip the petioles off and send in the trifoliate to the lab. Only send in clean, healthy tissue.
"If a farmer is doing a plant health checkup, send in random tissue samples throughout a field. If trying to confirm a deficiency, concentrate samples from that bad area, but we also need samples from the good area to compare," says Golden, which goes for all crops.
COTTON
-- Send in the uppermost, fully expanded vegetative branch located under a reproductive branch. Farmers can either submit samples with or without petioles for analysis. However, find out whether the lab's tissue test is correlated to petioles or leaves to know what to send in.
-- The leaves are usually the youngest photosynthetically active mature leaves, which are the best indicator of current nutrient status.
RICE
-- Submit whole plants for analysis until midseason, when inner nodal elongation and joint expansions start to occur. This generally occurs after the mid-tillering phase, when plants start to grow robustly.
-- For bigger rice plants after midseason, collect the uppermost three to five leaves as plants near heading.
-- Rice differs from other crops because of its smaller leaf size. Forty to 50 plants are likely needed for a sample to analyze.
GENERAL
Here are a few other helpful hints:
-- All plant material needs to be dry and mailed, or transported in a paper bag or other breathable material to prevent mold growth, which can destroy samples and cause inaccurate results.
-- Mail or deliver samples to diagnostic labs at the beginning of the week to expedite processing. This also avoids samples arriving on a weekend or at the end of the work week, when they could sit and deteriorate.
-- Compare test results with soil tests and yield data, which provide extra layers of information to make in-season nutrient decisions.
-- Labs often interpret samples differently, providing different nutrient recommendations.
"The more data a farmer has, the better apt they are to make a good, economical decision to benefit their bottom line," Golden explains. "Taking tissue samples ... will let you home in on what's limiting your crop's growth potential."
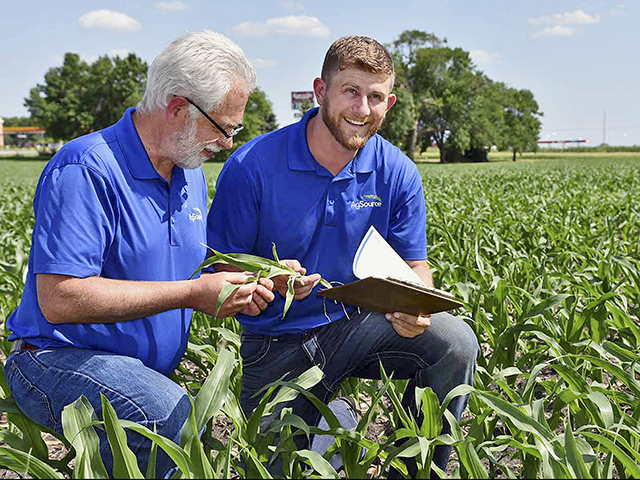
TIPS FROM THE LAB
VAS AgSource Laboratories is one of many companies nationwide with certified labs that analyze crop tissue samples. Its labs are located in Lincoln, Nebraska; Ellsworth, Iowa; and Bonduel, Wisconsin.
Tissue analysis costs about $20 per sample but can vary at VAS AgSource Laboratories. Chris Ibsen, regional sales representative, says tissue sampling can help maximize production and protect a farmer's investment in the field.
"(Tissue sampling) allows growers to detect deficiencies before signs of stress appear," he says.
Here's sampling tips from VAS AgSource Laboratories:
-- Each sample should not represent more than 20 acres.
-- Determine the proper plant part to submit for testing. As a general rule, collect the leaf blades or petioles from the most recently mature leaves.
-- Avoid sampling from unusual areas.
-- Do not sample from stressed areas, such as waterlogged locations.
-- Sample each plant species separately.
-- Collect samples at the same time of day.
-- Remove soil to plant samples by brushing with a paper or cloth towel.
-- Samples may be washed with deionized water, but don't soak them.
To speed up the testing process and protect the integrity of mailed samples, Ibsen recommends farmers send samples to the nearest lab and at the beginning of the week. "The last thing farmers want to do is put tissue samples in a box at the end of the week and they sit in a UPS drop site until the following Monday," he says.
-- For more information about VAS AgSource Laboratories, locations and tissue sampling, go to: laboratories.agsource.com.
**
FOR MORE INFORMATION:
-- Nutrien eKonomics Tissue Sampling Demonstration: www.nutrien-ekonomics.com/agronomics/tissue-sampling-demonstration
-- Follow Matthew Wilde on Twitter @progressivwilde
[PF_0621]
(c) Copyright 2021 DTN, LLC. All rights reserved.