
Solar Paddock
10 Steps to a Solar-Powered Polywire Paddock
Who doesn't need an extra paddock now and then? Paul Luna, a ranch/facility assistant with Oklahoma's Noble Research Institute has some tips and tricks to make it all come together.
Many times, ranchers will already have most of the materials needed to pull this paddock together. Materials include fiberglass posts, drilled fiberglass corner posts, an electric gate handle, double foot tread-in fence posts, metal T-post for a charger (optional), insulated wire, turbo wire or polywire, a geared fence reel, grounding rod, solar charger with battery pack, fence charger alligator clips, fault finder, and survey flagging tape.
STEP 1. To build the paddock, start by connecting a gate handle to the end of your polywire (wound on a geared fence reel).
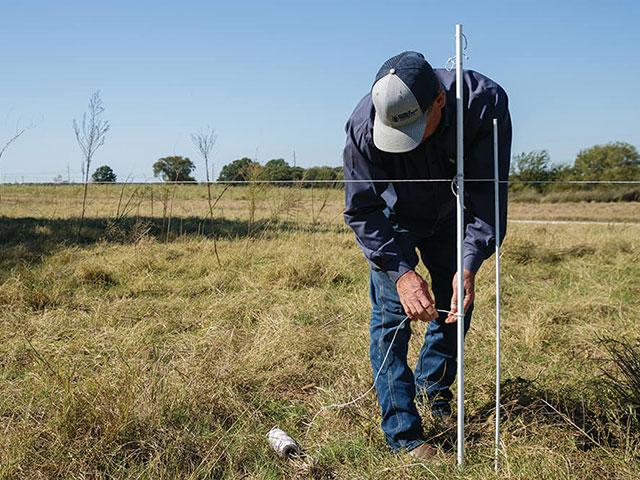
STEP 2. Attach the gate handle to a permanent fence or T-post, using an insulated wire at the desired wire height for the paddock.
P[L1] D[0x0] M[300x250] OOP[F] ADUNIT[] T[]
STEP 3. Place a drilled fiberglass corner post on the other end of the gate.
STEP 4. Wrap the polywire through a drilled hole at the desired height for the wire, and then around the top of the corner post.
STEP 5. Drive another corner post into the ground at the next corner of the paddock, repeating the tie process.
STEP 6. Tighten the slack on the polywire so the line does not dip.
STEP 7. Place fiberglass posts 10 to 11 yards apart between the two corner posts.
STEP 8. Repeat process until you get to the last side.
STEP 9. Use the fence reel to make a second gate between the last corner post and a permanent fence if that is an option based on location and number of paddocks. Lock the reel and hang on the permanent fence.
STEP 10. Connect the charger by hammering the grounding rod into the ground outside the paddock near the permanent fence, where you are connecting your solar charger. If your charger has a T-post mount, drive a T-post into the ground and place the charger -- otherwise position the charger on the ground, angling the panel for the most sunlight exposure (usually to the south). Connect the positive post of the charger to the paddock fence wire with the positive alligator clip, and the negative post to the grounding rod with the other clip. Turn on the charger and test the voltage. If voltage is lower than 4 kilovolts, use your fault finder to determine where the issue is.
TIPS AND TRICKS. Luna notes there are a few things he's found over the years that make the whole process a little easier. First, he says if forage is too high or wet, use a side-by-side to push down a path where you want the polywire fence to go. If you're trying to work in a low-lying area, use a tread-in post instead of a regular post to keep the line at the recommended height. Use the survey flagging tape to help keep polywire line visible for your safety and the cattle -- this is especially important in areas that are shaded. He likes to place polywire at a height of 36 inches for cows, 33 inches for stockers. And lastly, Luna says he recommends purchasing a larger solar charger than you think you'll need for the job.
For more details and images, go to https://www.noble.org/…
(c) Copyright 2022 DTN, LLC. All rights reserved.

