

Build This Rack to Store Go-To Tools
Find Your Go-To Tools Every Time With This Simple Tool Rack
Every shop has a set of go-to tools. They are the tools you spend all your time looking for -- rarely are they where you think you left them.
DTN/Progressive Farmer's latest Sunday welding project shows a solution for the problem. We call it the wall-mount tool rack.
See the project video here: https://www.dtnpf.com/….
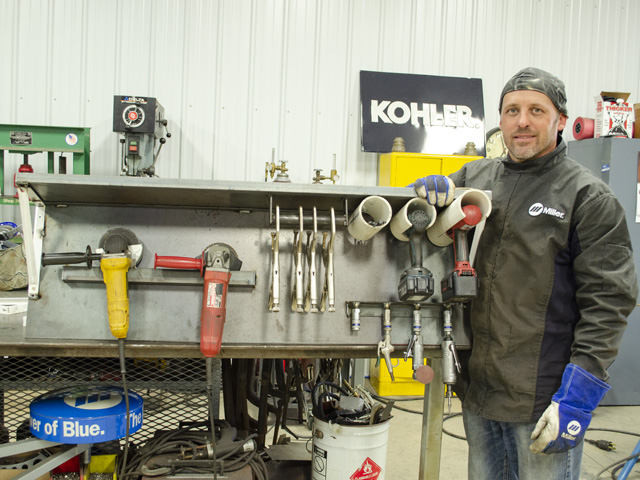
"You want to keep a few tools at hand. These are tools you're always looking for," said Joel Ort, our welding consultant and project manager for DTN/Progressive Farmer, explaining uses for the tool rack. Ort lives in Hortonville, Wisconsin.
Because he often works with steel, the design of the rack shown here complements that work. Ort's rack accommodates grinders, welding clamps, air tools and battery-powered tools. It shows storage ideas you might use to store your own go-to tools. The rack features a top shelf for additional storage.
Your tools dictate the overall dimensions of the rack on which you want to hang it.
Four materials are central to this rack: 1/8-inch plate steel, 1 1/2-inch by 1 1/2-inch angle iron, a length of 3-inch diameter PVC and three coat closet shelf brackets.
P[L1] D[0x0] M[300x250] OOP[F] ADUNIT[] T[]
Here are six tips for assembly to supplement steps shown in the video:
1. Layout. Lay out a rough assembly of the pieces before welding. Place the tools where you expect to hang them on the rack. This is an important step to make sure there is proper spacing between all the tools.
2. Shelf. The shelf is framed with 1 1/2-inch by 1 1/2-inch angle iron. The shelf surface is made from a 1/8-inch steel plate. Ort squared the corners and clamped the angle iron before welding. The shelf is spot welded to the shelf frame. Three inexpensive shelf brackets support the shelf assembly. The brackets are spot welded to the underside of the shelf and to the 1/8-inch steel back of the rack. Three tips for this step:
-- Overlap: Simply overlapping the angle iron means the frame will not lay flat. You can cope the corners or remove the overlapping material. This technique creates a strong, 90-degree angle.
-- Remove: Grind off paint from the shelf brackets where the spot welds will connect them to the shelf and to the back of the tool rack.
-- Shelf: Make sure the shelf is wide enough to accommodate the brackets.
3. Driver holsters. Ort wanted to hang a cordless drill and impact driver from the tool rack. Mounted parallel to the rack, they would have consumed a lot of space. He decided instead to create storage space perpendicular to the rack. To do this, he used lengths of 3-inch PVC pipe to create holster-like assemblies for the drills. Note in the video how Ort created U-shaped pieces in two of the PVC pieces. The length of the slots accommodates the handgrips of the drill and driver. The third piece of PVC holds zip ties. Each piece is attached to the bottom of the shelf with two bolts, nuts and washers.
4. Air chucks. To hang compressed air tools from the tool rack, Ort welded air chucks to angle iron. He welded the angle iron with chucks to the tool rack back.
5. Clamp bar. Envision a toilet paper holder for welding clamps. Ort cut a length of steel tubing and then welded to each end a piece of flat bar. He welded the clamp bar assembly to the underside of the shelf.
6. Grinder bar. Ort cut a length of angle iron long enough to accommodate two grinders. Key to this step are the two pieces of steel Ort cut as spacers. Welded to each end of the angle iron, the length of these pieces create enough space to accommodate the thickness of the grinder shields.
Cost: $125
Time: 1 day
Difficulty (1-5): 3
Dan Miller can be reached at dan.miller@dtn.com
Follow him on Twitter @DMillerPF
(c) Copyright 2021 DTN, LLC. All rights reserved.