

Time to Check Grain Carts, Dryers
Here's How to Check Two Important Harvest Tools: Grain Carts and Dryers
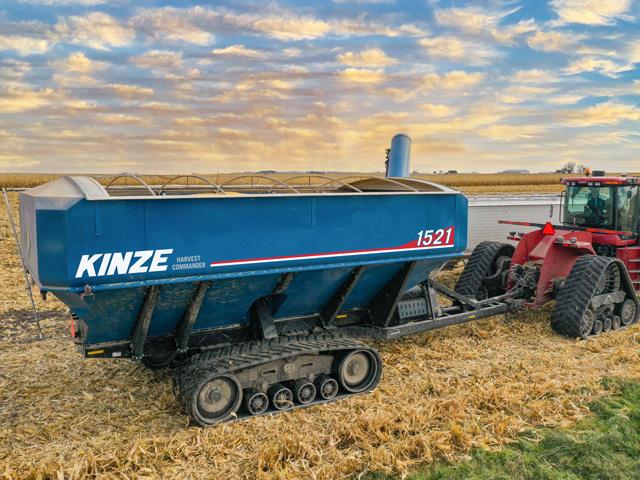
It might be time to lift the lid on a couple of key pieces of equipment important to the upcoming harvest: the grain wagon and the grain dryer.
"The grain cart is a hard-working piece of equipment, so you'll want to be sure it's in good operating order before the combines roll," Justin Render, Kinze senior product specialist, told DTN/Progressive Farmer. He offered a preventative maintenance checklist -- much of which also doubles as a safety checklist -- for the operation of grain carts.
CHECK THE GRAIN CART
-- Cart wheels. Reset the torque on the wheel nuts and check the tire pressure. Check wheel bearings for wheeled carts and lubricate or repack bearings.
-- Tracks. For carts with tracks, check track alignment (the operator's manual will contain those steps) and belt tension to ensure even track wear. Be sure the bogies are properly lubricated, belt tension is correct, and axle bolts are not worn or cracked. Perform a visual inspection of the main track frame for damage or cracks.
-- Driveline. Repair or replace worn driveline components, including gears, shafts and gear boxes. Hydraulic hoses and connectors should fit properly and be free of visible wear spots or leaks. Inspect gearbox oil level.
-- Augers. Augers will become smaller in diameter over time, diminishing their overall performance. Inspect for wear especially where grain transitions from the horizontal to the vertical auger or from the lower to upper vertical auger. These grain transition areas are high-wear areas and when worn, cause slow unload times and extra strain on other driveline components. Check the safety grating. Make sure it is in good repair to prevent operators from being pulled down into the auger.
-- Lubrication points. Make sure all are functional and greased. Inspect the gear box oil level and condition and replace oil. If the gearbox is run by chains, check the chain condition and lubrication.
-- PTO/drive belts. Make sure they are properly adjusted and that the serviceable parts of the PTO shafts are adequately greased. Check adjustment, alignment and for heavy cracks in the grooves or other visible damage. Also ensure linkage is free to move and engages and disengages smoothly.
P[L1] D[0x0] M[300x250] OOP[F] ADUNIT[] T[]
-- Cart body. If using a manual or electric tarp, check for any tears or wear spots. Ensure that it rolls freely and has proper tension when closed. If electric, make sure power cables are clean and in good condition, validate proper operation and confirm that the remote works correctly. Check for cracks in the side panels and frame.
-- Scales. Check that scales are in good condition and properly calibrated. Check the cart weight of at least five different loads with a legal for trade scale. Use the data to calibrate per your owner's manual. Inspect all grain cart scale wires for damage and routing to prevent damage in the field.
-- Safety. Check safety chains, draw bar hitch pins and the clevis hitch to make sure they are not bent or broken. Confirm that lighting, turn signals and flashers are working properly, and determine if slow-moving vehicle signs or luminous safety tape needs to be replaced. Make sure that power shaft guards are in place to cover the rotating drive shaft connecting the tractor and cart.
CHECK YOUR GRAIN DRYERS
AGCO Grain and Protein brand GSI suggests a thorough check of your grain dryer.
"A complete preseason check, preferably by your servicing dealer, is extremely important to ensure dryers will be in good working condition to help protect the quality of stored grain," Randy Sheley, GSI dryer product specialist, told DTN/Progressive Farmer.
Sheley offered maintenance recommendations:
-- Safety first. Lock out the electrical main safety disconnect before checking or servicing any electrical or mechanical device on the dryer. Follow the dryer manual for safety guideline. Do not attempt any electrical or gas repairs unless you are trained to do so.
-- Clean. Make sure all supply augers, downspouts and columns of the dryer are completely free of any debris, especially bird nests. Thoroughly clean the control box and make sure floors or internal areas are free from fines or debris.
-- Inspect. Check belts for wear, hardness from age and proper tensioning. With all valves closed and lines empty for safety, check all gas hoses and connections to ensure they are not leaking. Inspect the burner to confirm there are no insect nests or other obstructions.
-- Test Run. Check the dryer for proper operation before filling with grain by following these steps:
1. Turn on main power to dryer and make sure all emergency stop switches are closed. Be sure all personnel are safely away from any moving parts or electrical connections.
2. Bring up the control circuit to check safeties and operational screens, then start the load, metering and unload systems while testing automatic safeties and shutdown systems.
3. Start fans and burners with the gas supply off to check for proper operation of the safety system. The dryer should shut down within a minute.
4. After carefully and slowly opening the gas supply, start the fans and then burners to make sure they properly light and operate with no unusual voids or color in the flame. On some dryer models, burners may not be operational until the dryer is filled with grain.
5. Make sure the columns fill correctly and that dryer load automatically shuts down after it is full. Do one final inspection after starting the fan then the burner to make sure the gas pressures are correct and the temperature control system is operating properly.
Dan Miller can be reached at dan.miller@dtn.com
Follow him on Twitter @DMillerPF
(c) Copyright 2022 DTN, LLC. All rights reserved.