

Build This Aluminum Bed Extender
Welder Builds Lightweight Bed Extension for His Side-by-Side
Our Wisconsin welding consultant Joel Ort owns a Honda Motorsports Pioneer 1000-5. It's a high-powered, 999-cc, six-speed side-by-side. The dash and numeral 5 means it carries five passengers -- three in the front and two in the back.
The back seats, in a neat and easy transition, can be converted into a cargo box. Without rear passengers, Honda engineered a way to fold the two independently operating rear seats down into the floor of the cargo box. With both seats folded, the large cargo bed holds 1,000 pounds of material and gear.
When both seats are in use by passengers, the available cargo space shrinks significantly.
What remains is a narrow storage slot, especially tight when the rear tailgate is closed. Amazon sells bed extenders -- to increase the length of this space when the rear seats are in use -- for as much as $455. Held by straps to the open tailgate and to the back of the seats, these extenders do increase the space for gear and supplies. But the straps may work loose.
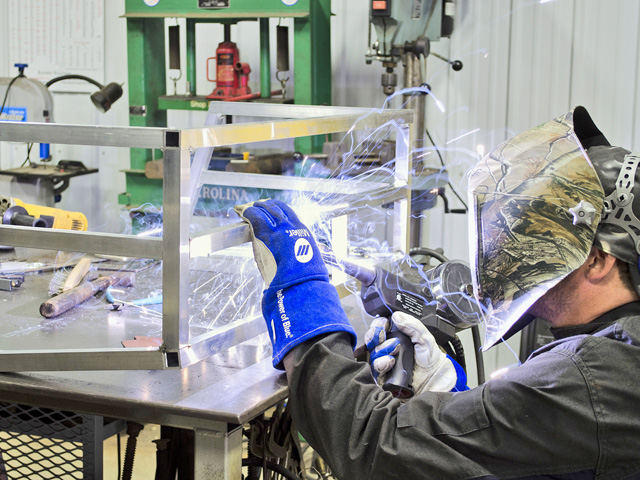
Ort has a better idea. He can make a lightweight bed extender in his shop with aluminum. And it can be mounted to the rear of his Honda without tools for $125. See the video about the cargo box extension project here: https://www.youtube.com/….
To see a recent story about working with aluminum go here: https://www.dtnpf.com/….
To hold his bed extender firmly to his Honda Pioneer, Ort mounted a pair of turnbuckles to the bed -- one on each side of the bed extender. He hooked the free ends of the turnbuckles to the pair of D-rings Honda mounted onto the Pioneer's tailgate. The turnbuckles are hand-tightened as needed.
Ort designed one more significant feature during fabrication. It's a step important to holding his bed extender tightly in place. It took a bit of trial and error, but he bent the aluminum tubing used to fashion the bed extender to closely mirror the profile of both the tailgate (which does not lay completely flat when opened) and the backs of the seats (which angle backward).
P[L1] D[0x0] M[300x250] OOP[F] ADUNIT[] T[]
Two important welding tips:
1. The surface of aluminum material may be contaminated by oil and grease. It must be cleaned before welding begins. Aluminum also naturally accumulates an oxide layer that also must be removed. Use a solvent to degrease the aluminum, preferably one that leaves no residue. Dry the surface with a paper towel.
2. Use a wire brush to remove the oxide layer, but make sure its bristles are made of stainless-steel wire. It's best to dedicate this brush only to cleaning aluminum. If it's used for other purposes, for example on steel, the brush will contaminate aluminum used in later projects.
When you watch the video, here are seven tips to look for:
-- Ort used a Millermatic 252 with a 30A spool gun for this welding project.
-- It's easy to cut precise angles with a compound miter saw.
-- An 80-tooth carbide blade easily cuts aluminum.
-- The bottom portion of the extender bends upward to match the angle of the Pioneer's tailgate. The backside of the basket that will rest against the rear seats conforms to the backward angle of the rear seats.
-- Additional horizontal and vertical cross-members strengthen the extender and better hold the cargo in place.
-- Drill holes in each side of the extender to mount the turnbuckles.
-- Turnbuckles hold the bed extender in place. The turnbuckles are mounted to the frame of the bed extender with a bolt. The bolt and a washer are inserted through the frame, then another washer, a spacer, washer, turnbuckle, another washer and nut complete the assembly. The turnbuckle must be able to spin freely as mounted to the bed extender.
Difficulty (1-5): 4
Cost: $125
Time: One day
Dan Miller can be reached at dan.miller@dtn.com
Follow him on Twitter @DMillerPF
(c) Copyright 2021 DTN, LLC. All rights reserved.